Connect AI Chatbot to WhatsApp Business
Prerequisites
Set Up Meta Developer App
1
Create a Meta Developer account
Go to developers.facebook.com and log in with your Facebook account. If you don’t have a developer account, you’ll be prompted to create one.
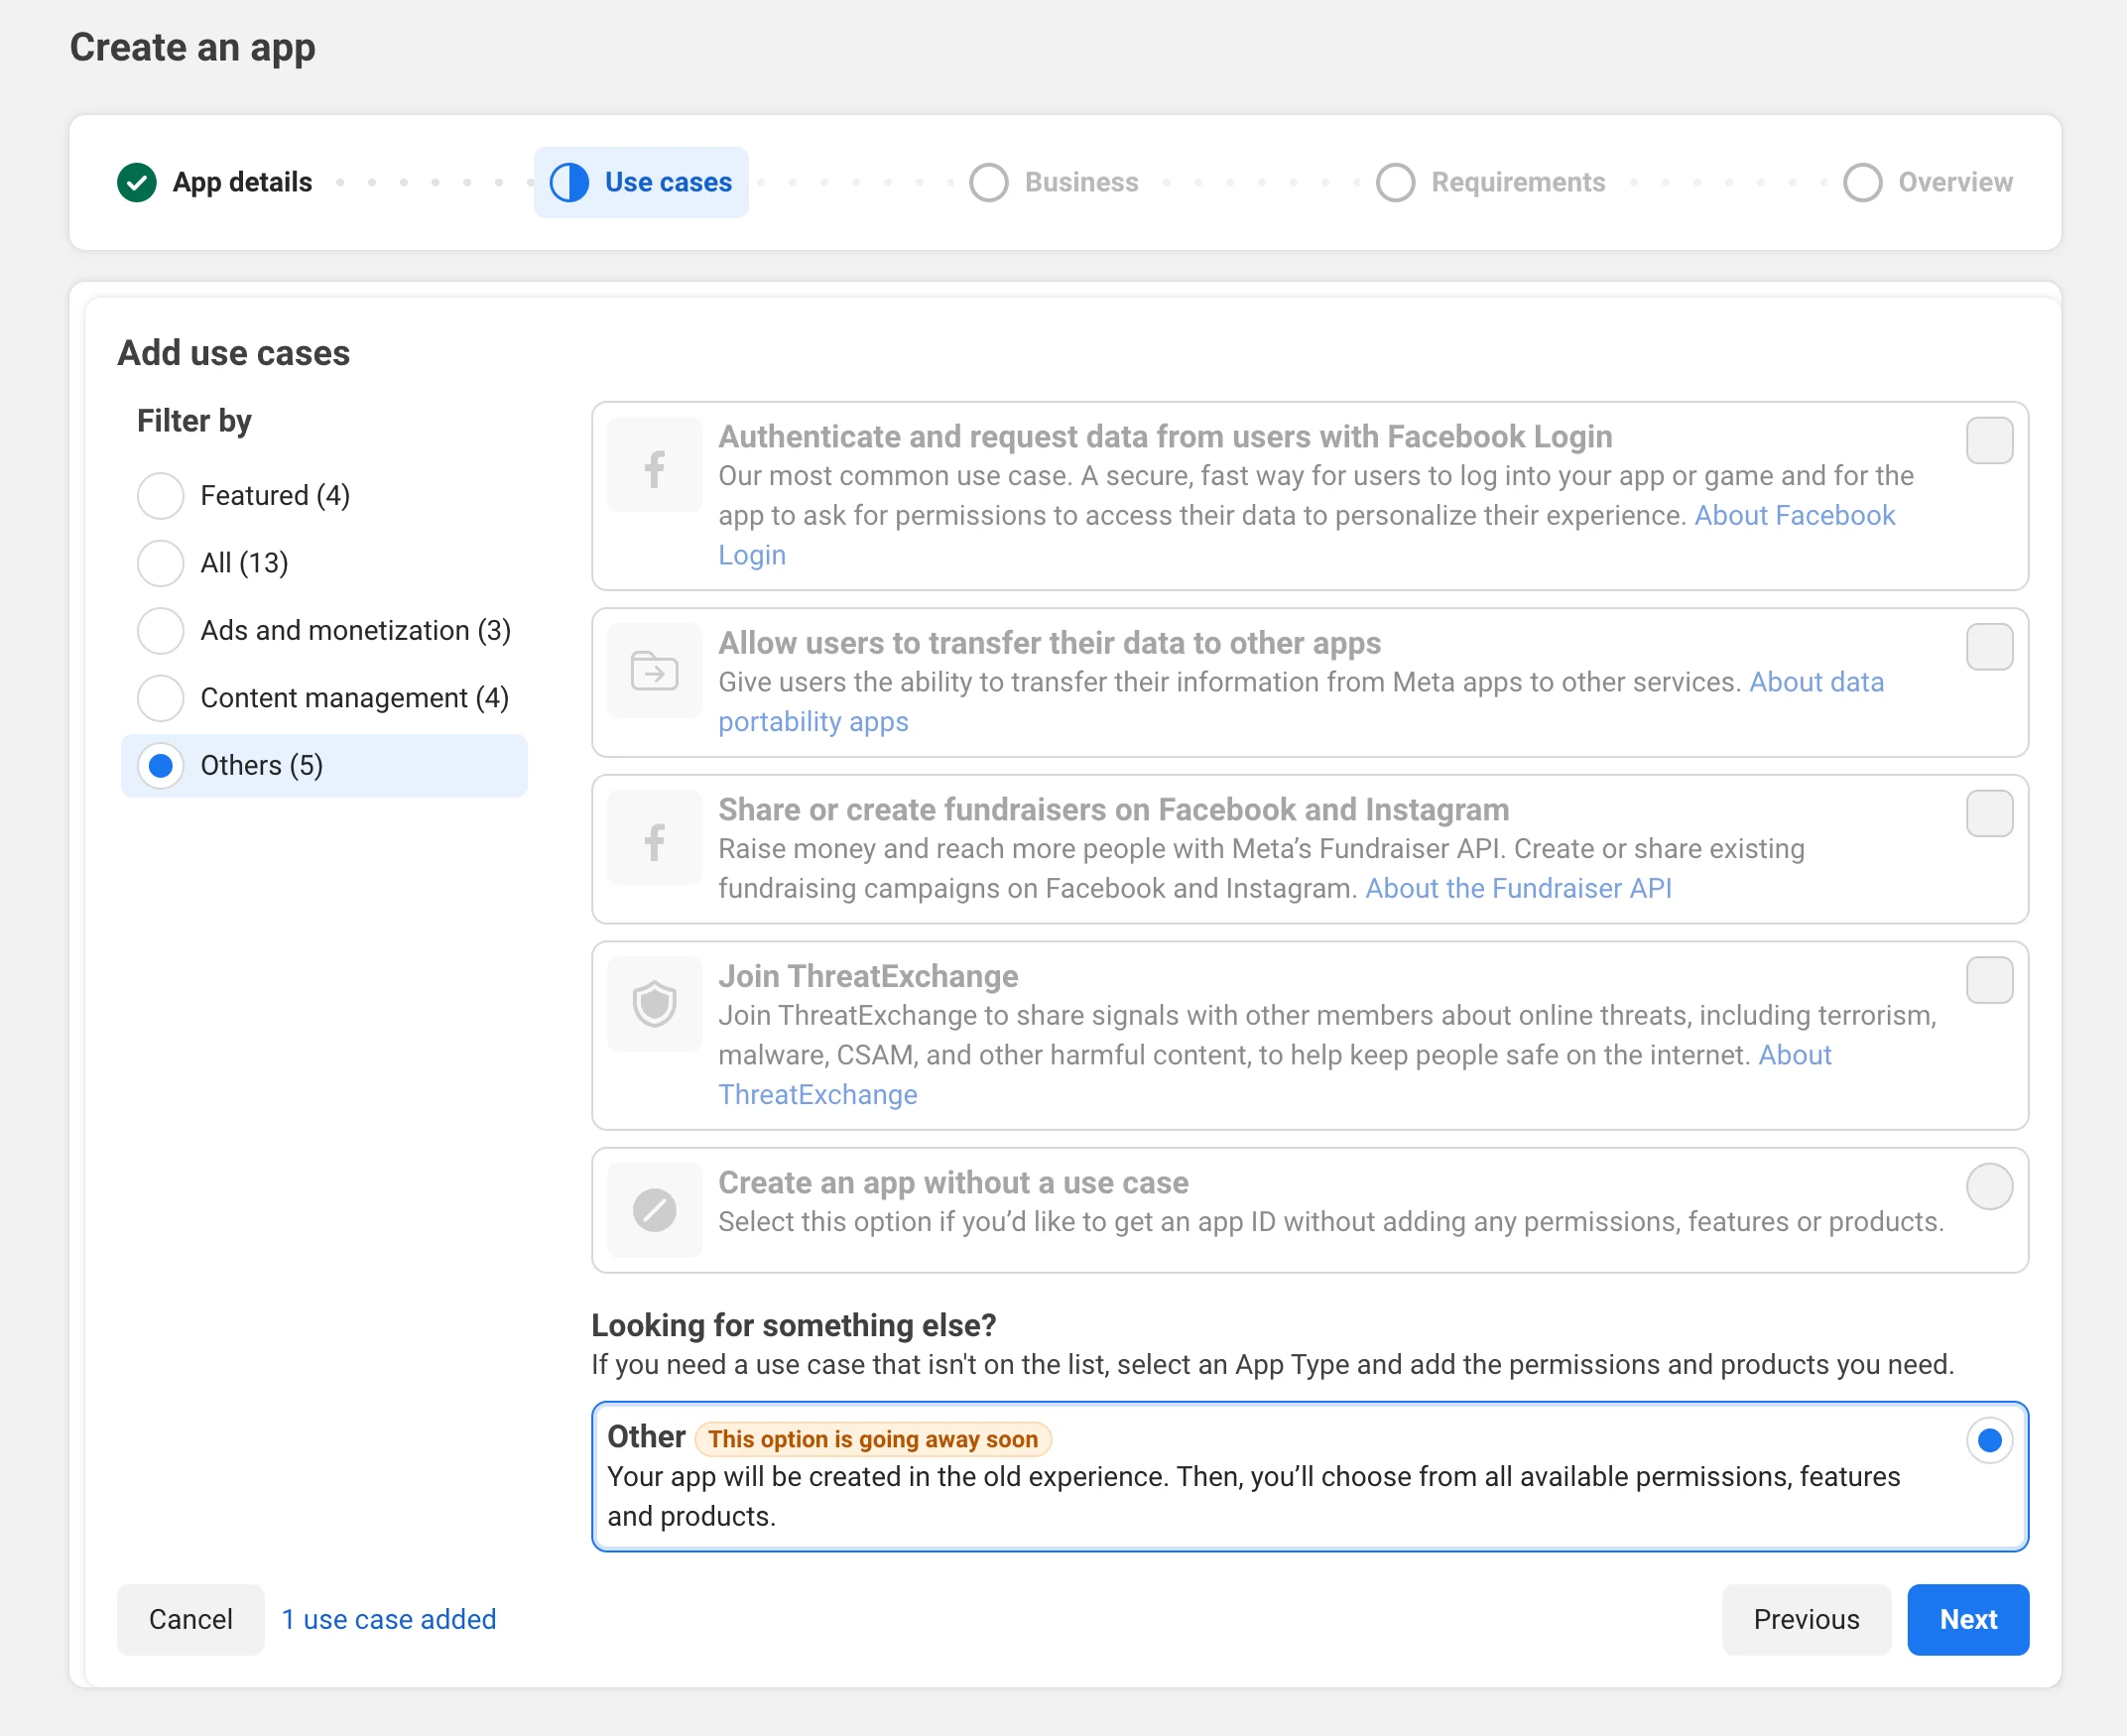
Click My Apps in the top right, then Create App. Give it a name (e.g., “My Business WhatsApp Bot”), and click Next. Under Add Use Cases filter by Others, then select Other. Click Next.
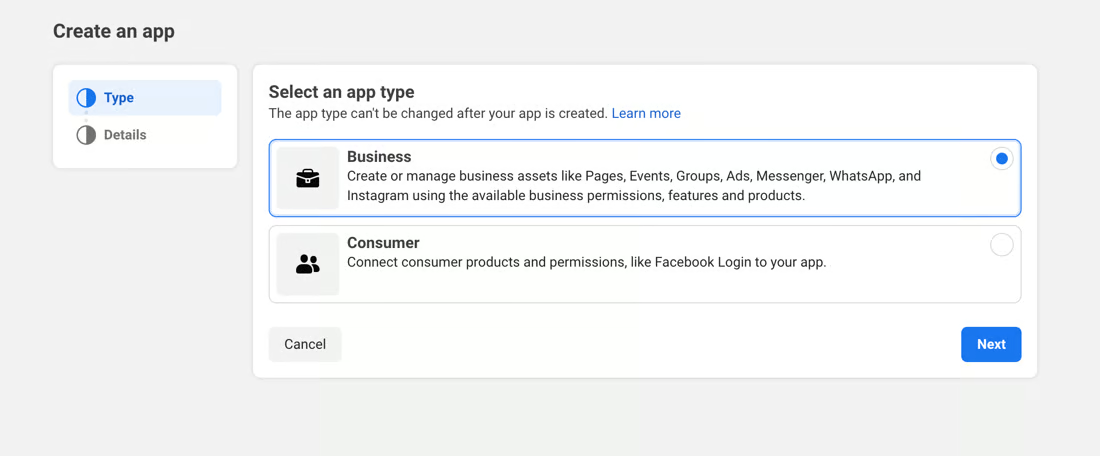
Select the Business app type and click Next. Then select Create App on the next screen.
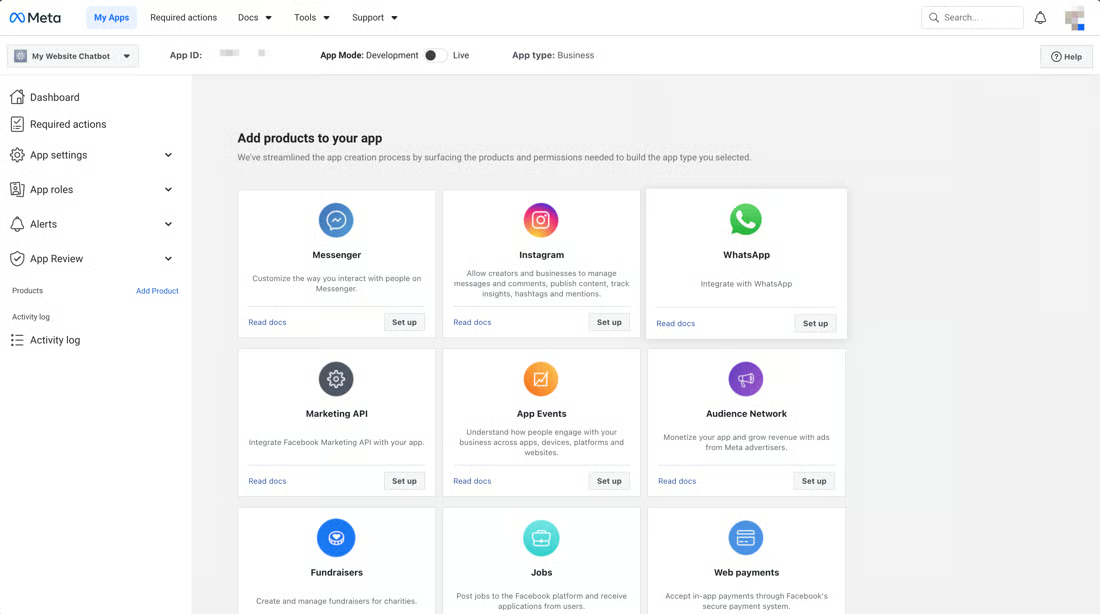
In your app dashboard, scroll down to Add products and click Set up on the WhatsApp card.
5
Select or create a Meta Business Account
You’ll be prompted to select an existing Meta Business Account or create a new one. This is required to use the WhatsApp Business API.
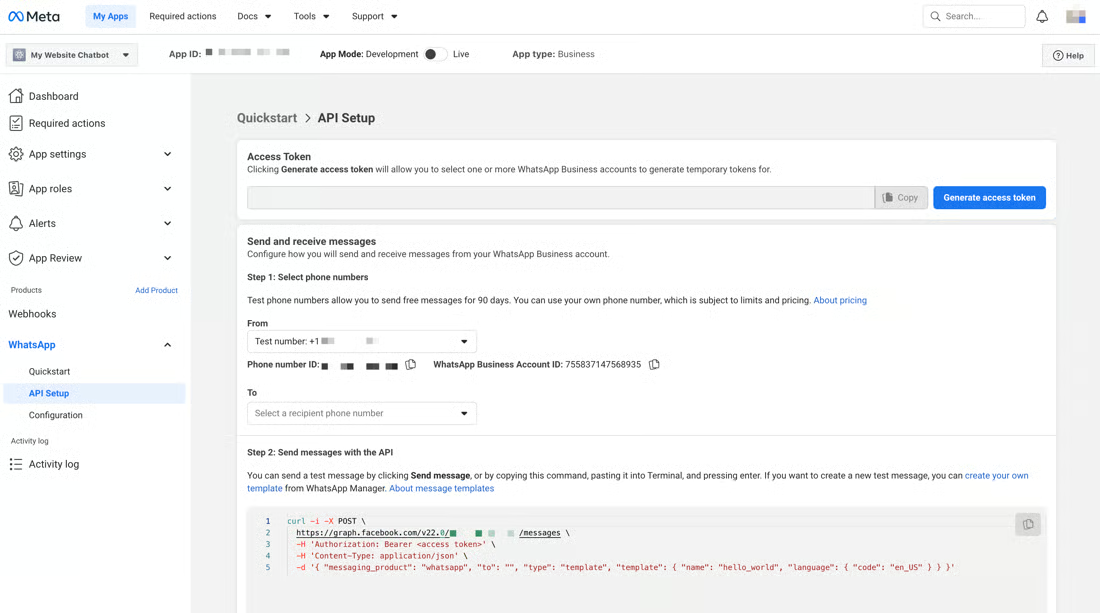
In the WhatsApp section of your app, go to API Setup. Click Add phone number and follow the verification process. You’ll receive a code via SMS or voice call.
Get Your API Credentials
1
Get your Phone Number ID
In WhatsApp > API Setup, find your verified phone number. The Phone Number ID is displayed below the number (a long numeric string like 123456789012345).
2
Generate a Permanent Access Token
By default, Meta provides a temporary access token that expires in 24 hours. For production use, you need a permanent token:
- Go to Business Settings at business.facebook.com/ settings
- Navigate to Users > System Users
- Click Add to create a new system user (if you don’t have one)
- Give it a name like “WhatsApp API” and select Admin role
- Click Add Assets, select your WhatsApp app, and enable Full control
- Click Generate new token, select your app, and check whatsapp_business_messaging and whatsapp_business_management
- Copy the generated token – this is your permanent access token
Go back to your app in the Meta Developer Dashboard. Navigate to App settings > Basic. Click Show next to the App Secret field and copy it.
Connect to AI Chatbot
In your AI Chatbot dashboard, select your chatbot and go to Deploy & Install.
Click on the WhatsApp tab.
Fill in the three fields:
- Phone Number ID – The numeric ID from Meta’s API Setup page
- Access Token – Your permanent access token from the system user
- App Secret – Your app secret from App Settings > Basic
Click the Connect button. AI Chatbot will generate a Webhook URL and Verify Token for you.
Configure the Webhook in Meta
1
Go to WhatsApp Configuration
In your Meta Developer App, navigate to WhatsApp > Configuration.
2
Enter the webhook details
- Callback URL: Paste the Webhook URL from AI Chatbot
- Verify token: Paste the Verify Token from AI Chatbot
Click Verify and save.
Navigate back to WhatsApp > Configuration. Under Webhook fields, find the messages field and click Subscribe.
Test Your Integration
Troubleshooting
Messages not being received
Messages not being sent
Webhook verification failing
Going Live
To send messages to any WhatsApp user (not just test numbers), you’ll need to:
- Complete Business Verification – Verify your business in Meta Business Settings
- Request Production Access – In your app’s WhatsApp settings, request to go live
- Add a Payment Method – WhatsApp Business API charges per conversation (first 1,000 conversations per month are free)
For detailed information, see Meta’s WhatsApp Business documentation.
Join over 1000+ businesses, websites and startups automating their customer service and other tasks with a custom trained AI agent.